INTRODUCTION
With the sheer number of cyber threats which occur everyday, a lot of individuals want to tackle that and to be on the good side. But one main question which lingers on everybody’s mind is how to start. So if you’re an individual who just started his/her career in Cyber Security , a good place to start learning and applying what you have learnt is to work on Security Labs. They are designed to be vulnerable on purpose which helps you tackle a virtual website the same way you would tackle an authentic website or application in the real world. The virtual lab called “ThreadsApp” is a great place to test your skills as an individual or help teach a class of students who are trying to get into the cyber security domain.
About ThreadsApp
It is a vulnerable web application containing a number of vulnerabilities ranging from low level to the critical level vulnerabilities from the OWASP Top 10 that one may find in many real-world web apps. The main goal of ThreadsApp is to help people by letting them test their skills on the web application or to have someone demonstrate different attack scenarios and vectors. The GitHub link to the ThreadsApp application is https://github.com/enciphers/ThreadsApp. Further information regarding the ThreadsApp, including what type of challenges to expect etc can be found here, https://info.threadsapp.co.in.
The installation can be done in two ways –
- Setting up locally using a VPS(Virtual Private Server)
- Setting up locally using a virtual machine
First of all let’s learn about what a pentest lab is, followed by how to set it up and get it working. A lab is a place for beginners or even advanced users of any particular topic or field to test their skills in a safe online environment. It mimics how a real world application would work, so a user can test on that lab to increase his/her practical knowledge. Since most of the time either a written permission from the organization’s owner or the company with a responsible disclosure (Researchers can test for security flaws on the Company’s website, provided they adhere to the set of rules) is required for someone to test for security flaws and vulnerabilities on a website, a lab is the next best place for anyone to test their skills on.
What is a VPS
A VPS or a Virtual Private Server acts like a powerful computer that collects and stores all the information like files and data required to run a website. Using all the stored data it virtually mimics dedicated server environments within a shared server. Since VPS uses virtualisation, it divides one powerful server into various smaller servers.
VPS duplicates many of the properties of a physical server, with similar processes and functionality. Although it acts like a physical server, in reality it’s a piece of software that’s emulating dedicated hardware.
Why is VPS a better choice to host labs on over virtual machine:
- Although not as cheap as the traditional shared hosting, its value for money because you only pay for what you want, thus it’s cheaper than a dedicated server.
- The VPS instances (smaller networks the main network is divided into) are different and stored at different places. Due to this factor they are more secure in terms of security with respect to shared hosting environments.
- If used for creating a lab, one can add a domain name to the server and use it as a target for web application security training/practice.
How to set up ThreadsApp on a VPS
First you need to create a virtual private server on any platform, for example Digital Ocean or AWS. Once created, log into the server using SSH
- You will now need a SSH Client through which you can manage your VPS. The SSH Client used here is Termius which can be found on https://termius.com
- Set up your termius by clicking on +NEW HOST and filling the necessary details which include
- Label – Can be anything to your liking
- Address – It will be the IP address of your VPS
- Port – For SSH use 22
- Keys – Enter your public and private key here
- Username – root/user
.png)
- After filling the details, run the host and you will see a logged in session in the VPS machine if everything went smoothly
.png)
- For the rest of the installation steps, kindly refer to our GitHub Repository.
https://github.com/enciphers/ThreadsApp - The application will now be accessible via http://VPS_IP:3000 on your system. Close the application for now by pressing ctrl+c on the terminal(where you are logged in the SSH session)
- Now we know that we can access the web application by typing VPS_IP:3000, but it would be a tedious task to use this method recursively. Another way of doing this is to link a domain name to that VPS_IP so we can access the web application by entering the domain name itself. To add a domain name, you will need to purchase a domain name and then the corresponding DNS configuration, so that the domain name itself can be used.
- Once the domain DNS configuration is done, go to the directory where ThreadsApp is installed and open the .env file with any text editor, for eg. run the following command:
sudo nano client./env
.png)
- Here, replace the localhost:4000 in REACT_APP_API_BASE_URL with your VPS_IP:3000
Also , ensure that DANGEROUSLY_DISABLE_HOST_CHECK=true is added. It is important because otherwise the page will throw an “Invalid Host Header error. - Now we need to install nginx on the VPS. NGINX is important to install because it can manage huge amounts of connections which can be made to your VPS. It also acts as a reverse proxy and load balancer.
- Open your terminal and enter the following command:
sudo apt install nginx - After that, let’s configure nginx to make sure it acts as a reverse proxy and we can use the domain name of our choice to access the webpage. Open the terminal and enter the following command:
sudo nano/etc/nginx/sites-available/default - Inside the server_name section, replace the content with the following:
- server_name
- yourdomain.com
- http://www.yourdomain.com
- ;location/ {proxy_pass
- http://localhost:5000;#whatever
- port your app runs onproxy_http_version 1.1;proxy_set_header Upgrade $http_upgrade;proxy_set_header Connection ‘upgrade’;proxy_set_header Host $host;proxy_cache_bypass $http_upgrade;}
- Note: yourdomain.com and http://www.yourdomain.com are both placeholders and should be replaced by the domain name you want to use.localhost:5000 should be replaced with VPS_IP:3000
.png)
- Now type npm start to start the app, after it’s done, instead of localhost:3000, type the domain name, in this case it’s threadsapp.co.in
.png)
- The web app is now accessible via domain name as well. It is required to link the domain name with the server’s IP, by creating a record in your domain name management platform, like Godaddy, Digital Ocean.
- Now all thats left for you is to sign up with an account and start hacking.
How to set up ThreadsApp on your system
- Open the terminal on your ubuntu environment and type the following command
git clone https://github.com/enciphers/ThreadsApp.git

- Now open to that directory by typing cd ThreadsApp on the terminal.
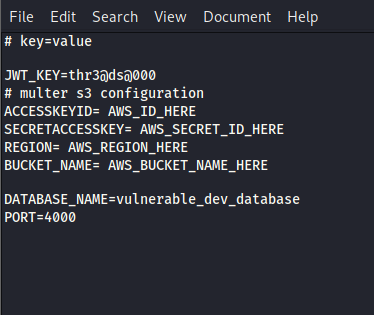
- There will be a config.env file, you need to enter the necessary information inside that env file.

- After filling the information, make sure that MongoDB is running, if it’s not installed you can refer https://docs.mongodb.com/manual/tutorial/install-mongodb-on-ubuntu/
- Once MongoDB has been set up and running, go back to the terminal and make sure your present working directory is the ThreadsApp directory.
- Type the following command and hit enter
npm install - When prompted for Do you want to add users with posts? if yes then type “yes” else type “no”. It is suggested to type yes to have a better experience of pentesting the web application, since dummy user data will be present.

- After the data has been added, type the following command
npm run client_install
After the installation is done, you have successfully installed ThreadsApp, now what’s left is to run it. - To run the ThreadsApp, switch to the ThreadsApp directory and type the following command
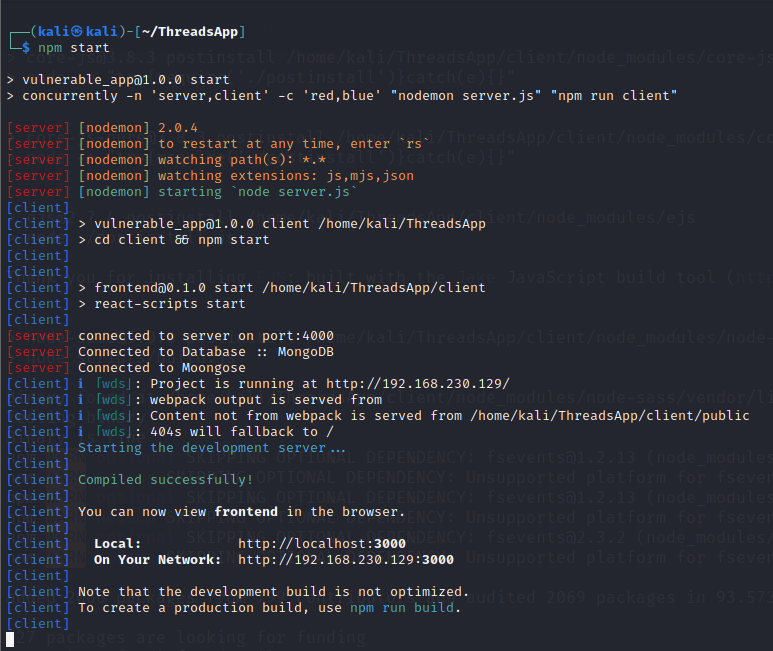
npm start

- A browser window will be opened and you will be redirected to the ThreadsApp.Now all that‘s left is for you to do is sign up and start hacking.

Solutions –
If you feel like you are stuck somewhere or can’t get the attack to trigger? Visit the following link to check how you’ve fared against our application.
http://solutions.threadsapp.co.in/
Tally your findings here to see what you found, what you missed. Pat yourself on the back for finding vulnerabilities, and learn what you missed.
Happy Hacking


